Showing posts with label artists' books. Show all posts

Friday, 3 July 2020

Explorations on black paper

I have set myself the task of doing a series of studies in the Hahnemuhle Black Book, trying to find the best mediums to use.  I particularly like to lino print on black, using white or a light tinted gesso which can then be enhanced with watercolour, acrylic inks or coloured pencil and there are several examples of this in my Artists Books gallery.  However, I wanted to explore further.

These two were mainly coloured pencil with touches of
acrylic line painters for the stamens


I liked using coloured pencils on the black, but it was quite difficult to get even the pale colours to stand out, despite using several layers.

This is a gesso lino print with coloured pencil
Here, the coloured pencil on the black areas seems to stand out more, and subtle variations of tints can be achieved by lightly applying the pencils over the gesso areas.

Saturday, 1 June 2019

Urban Sketchers June

We had glorious weather for our June sketch meeting today.  Our venue was the small Wiltshire town of Cricklade - the first town situated on the River Thames as it flows, from its source, towards London.  Just outside the town are the water meadows which are famous for an extensive display of snake's head fritillaries in April.  A previous post gives details of the artists' book I made about this beautiful wild flower location.

Today, most of us opted to sketch in the tranquil surroundings of St. Sampson's Church.

Trying out a suggestion by (Karen Stamper) which I recently found on on the internet, I pre-prepared two pages of my watercolour Moleskine.  Torn strips of masking tape, labels, etc. were added, followed by random washes of Indian ink, walnut ink, a little orange fluid acrylic and areas of white gesso scraped on with a credit card.


Some of the masking tape has been removed, but a couple of the labels
threatened to tear the paper surface, so they were left in place

I chose to record this corner of the churchyard


A somewhat messy outcome (and a missing gable window!),
but a fun experiment
I used a fine liner pen, burnt sienna watercolour marker, black Pentel brush pen, watercolour, white gouache and oil pastels.  I'm not sure I will adopt the masking tape and label idea, but the dark background encouraged me to be bolder with my sketching in an attempt to bring the image out of the chaos.


Monday, 13 May 2019

Blizzard book

Gradually working through the book "The Art of the Fold" - this month's task was the Blizzard Book (Section 12, page 71).  The finished size is only 5.7 x 9 cm (credit card size), but for the sixteen pockets suggested you need a paper length of 90 cm.  Luckily I had a roll of brown wrapping paper which I decorated with handmade stamps before attempting the folding.

The slip case is made from thin card and I followed the instructions from this video.


I have since tied the enclosed booklet with ribbon and
added the collaged decoration to the cover
(this photo also gives a truer idea of the colour)


Wednesday, 13 March 2019

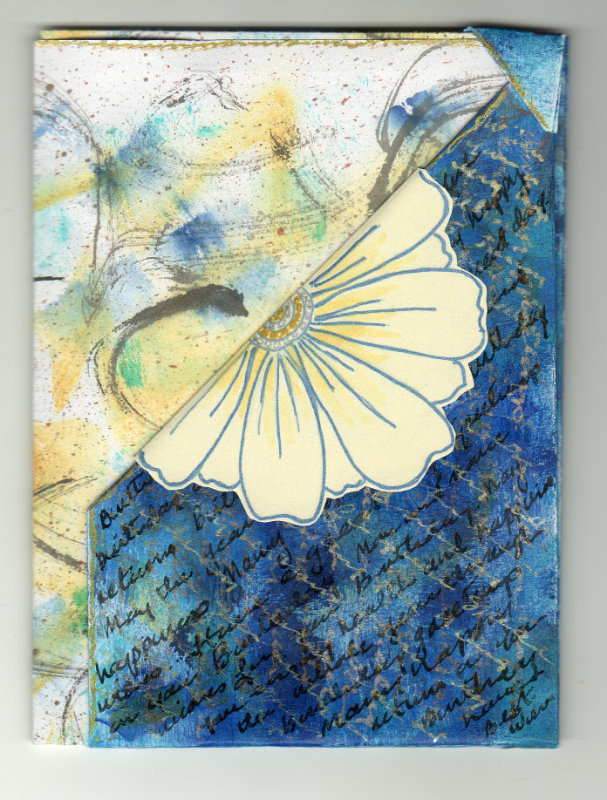
Another birthday booklet

This has become my current favourite fold book structure and, once the paper is painted and printed, is quite simple and quick to make.

The lilac side of the paper was painted first and I was unsure which colour to use on the reverse.  In the end I used a sponge roller with some silver acrylic and, when dry, lino printed over the top using white gesso.  I was quite surprised and pleased with how subtle the finished result was - it looked like brocade fabric.

The flower decoration makes it a bit bulky for posting, but I used a padded envelope and hoped it wouldn't end up too crushed.


Size approx. 4" x 5"


Monday, 25 February 2019

More artists' books

Tidying up my studio, I found a shoe box with some more of my earlier book making efforts.  So I have added a few more pictures to my Bookbinding Gallery page.

Triangular Valentine


Sunday, 17 February 2019

Bookbinding and Artists' Books


I have added another section to the Pages sidebar showing some of the handmade books I have produced over the years.  Do have a look.

Thursday, 25 January 2018

Bookmarks and an Altered Book

Following my participation in the Bookmarks Project (details here), I now have a set over 50 individual bookmarks from the 15th year of this challenge.  These have been languishing in an envelope in my "in-tray" since August last year and I have been wondering how to display them.  I came up with the idea of an altered book to house them, together with a niche for the original blocks I used to print my own contribution of 100 bookmarks.

I went in search of an appropriate book in the sales shelves of our local library and found one of the right size for 40p.  I was hoping to find one with a title relating to "books" or "reading", but no luck there.

Using about 120 pages at the end of the book, I cut out an area to contain the lino blocks, glued these together using plenty of gel medium around the page edges and the cut edges.  The whole of this area was then stuck to the back cover, with a piece of painted tissue between the two.

I still have 260 or so pages out of which I will fold and decorate pockets for the bookmarks.  Intervening pages will be cut out so that the book doesn't become too bulky.  Since deciding on this book I have found out that it would have been better to choose one with a stitched spine, rather than a glued one - the former would have allowed the cleaner removal of superfluous pages from the middle of each signature.  Let's hope this one holds together OK with all my alterations.

The novel is about slave-catchers in New York in the 1840's and each chapter commences with a related quote from that era - I aim to retain those pages unchanged.

The cut-out is just under half an inch deep


Just enough room for the lino blocks

A start on the folded pockets

Wednesday, 17 January 2018

Printing experiments

I have been printing a couple more fold books for birthday greetings (similar to this one).


I had some leftover gesso to use up and experimented with combining it with some Caran d'Ache Neocolour II water soluble crayons.

The gesso was already tinted a creamy orange.  First of all I coated my foam stamp with gesso then quickly scrubbed over crayons in reds and purple.  The result was a bit patchy, so I tried lightly dampening the stamp, adding the crayons, then gently adding the gesso over the top.  The latter method seemed to result in a better impression, but a bit more experimentation is needed.  I could have used just the crayons, but the addition of gesso sets the image should I need to work over it with other media.


Saturday, 7 October 2017

Another circle concertina book

I wanted to try out this book structure for a wedding anniversary greeting.   I made a smaller foam print so my computer-printed message would not be obscured.  The quadrant box was covered with scrunched tissue before being painted.

It's an easy book to make but care is needed to align the sections when sticking them together.  Using the eight pages, I find there is no need for anything to hold the book in its open circular position, but that might not be the case with fewer pages.


Thursday, 21 September 2017

The Sketchbook Project

Our local urban sketching group has decided to participate in this project  (see details here: www.sketchbookproject.com)

 A sketchbook has been purchased and we have until the end of March 2018 to complete and return it to the Brooklyn Library, NY.  The book measures 5” x 7” and contains 16 pages (i.e. 32 sides), this will be passed around the group with each participant using 2 or 3 sides. 
The paper is rather thin so care is needed if using watermedia – an alternative is for contributors to supply their sketches on separate paper which can then be glued into the book.
I wanted to include something particularly relevant to our locality, so decided to use the information and a couple of images I gathered when putting together my booklet on the fritillary nature reserve.  My third was a pencil portrait with added collage.

Left - collaged lino print on mulberry paper
Right - pen and watercolour sketch


Pencil, watercolour, collage and acrylic print
   

Tuesday, 16 May 2017

Print workshop

At our local art group meeting last night, six of us set up tables around the hall with materials and examples of our individual printing techniques, with colleagues able to browse, watch mini demonstrations and ask questions.  We had lino printing, gelli printing for collage, Japanese woodblock, pastel painting with handcut stencils, inkjet and laser print transfers. It was a very successful and interesting evening, but unfortunately I was so busy with my display, in addition to trying to get a quick glimpse of what everyone else was doing, I completely forgot to take photos for our website write up.  I am hoping those participating will send me some notes and photos so I can rectify the matter. (Additional notes and images have been added here.)

My set-up included lino and Softcut, as well as handmade foam stamps, paste grain papers, printed tissue, mulberry and drawing paper which I use for cards, artists books and collage.

Sample papers, printing blocks and tools
Booklets and cards using handmade printed papers

Wednesday, 7 December 2016

Bookbinding workshop

Last week I attended a bookbinding workshop tutored by Josie Brown.  Josie is a calligrapher and she also makes delightful artist's books.

The structure we were making was a Japanese butterfly bound book, this involved sewing the sections with four needles - supposed to be really simple, but it was also quite easy to get in a tangle until you got the hang of it!  We used various weights of drawing and watercolour paper, with the binding allowing the book to open quite flat - ideal for use as a sketchbook. The cover was an uncomplicated folded wrapper into which the end papers of the book were slotted.

The sewn book block to which I added painted end papers

The folded cover
The end papers in place

I decorated the cover with a thin strip of salvaged end paper

Josie also showed us how to make a slipcase.  We didn't have enough time to make this on the day, but came away with an instruction sheet for later use.


Thursday, 3 November 2016

Handmade books and cards

I really enjoy spending an evening randomly painting and printing sheets of paper to use for folded books and special occasion cards.  Things can get quite messy and sometimes an unpromising start can turn out to be really effective.  These are some of the results of my past efforts.

Outside front - folded size 3.5" x 5.5"

Inside
This is made from one sheet of paper - no glue or stitching needed - but both sides of the paper are painted differently to highlight the folded nature of the book.  (The greetings and floral motif on cream paper were printed on the computer and added separately.)


Handmade card and envelope - approx. 4.5" square

Origami box with paper band (approx. 4" square)
This was difficult to fold neatly, I should have used a much thinner paper.  Again, the paper was painted on both sides in toning colours.  It opens up like a little box to reveal a separate folded message inside (unfortunately I forgot to photograph that bit before I put it in the post!).


Folded card with paper buttons (outside)

Similar to the blue one above, but with paper flower insert

Wednesday, 18 May 2016

More handmade books

A handful of artists' books from the archives.

Approx. 5" x 3.5"
Wax resist and acrylic painted cover, lino printed images inside and computer printed text

Approx. 6.5" x 4" x 4"
Decorated with acrylic inks

8" x 6" photo album with black pages

A flutter book structure 4.5" x 6"
The flutter book was made on a bookbinding course using plain paper.  Ideally, it should be made with decorated paper from the start as it is difficult to add images and text after completion.