Tuesday, 16 July 2019

Paper Fabric

At the beginning of this year I finally got round to experimenting with some paper fabric.  You can find some useful instructional videos on Youtube by searching for "paper fabric".

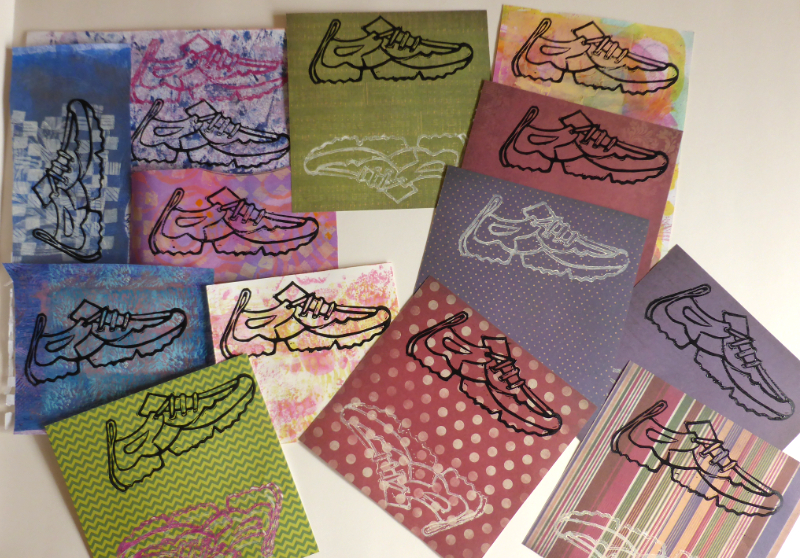
My base material was calico (unbleached cotton), over which I collaged various oddments of my hand-printed tissue paper.  I used Golden soft gel medium, making sure the fabric was liberally coated, then applying and overlapping sections of the tissue, brushing over all again with the gel to ensure good adhesion.  I had chosen tissue in the pink/blue/purple range, but unified the surface further with fluid acrylic glazes of magenta and blue.


I had no particular plans for this piece, but have recently acquired an iPad Mini and the fancy magnetic cover/stand that I purchased for it only protects the screen, so the idea of a custom-made case came to mind.

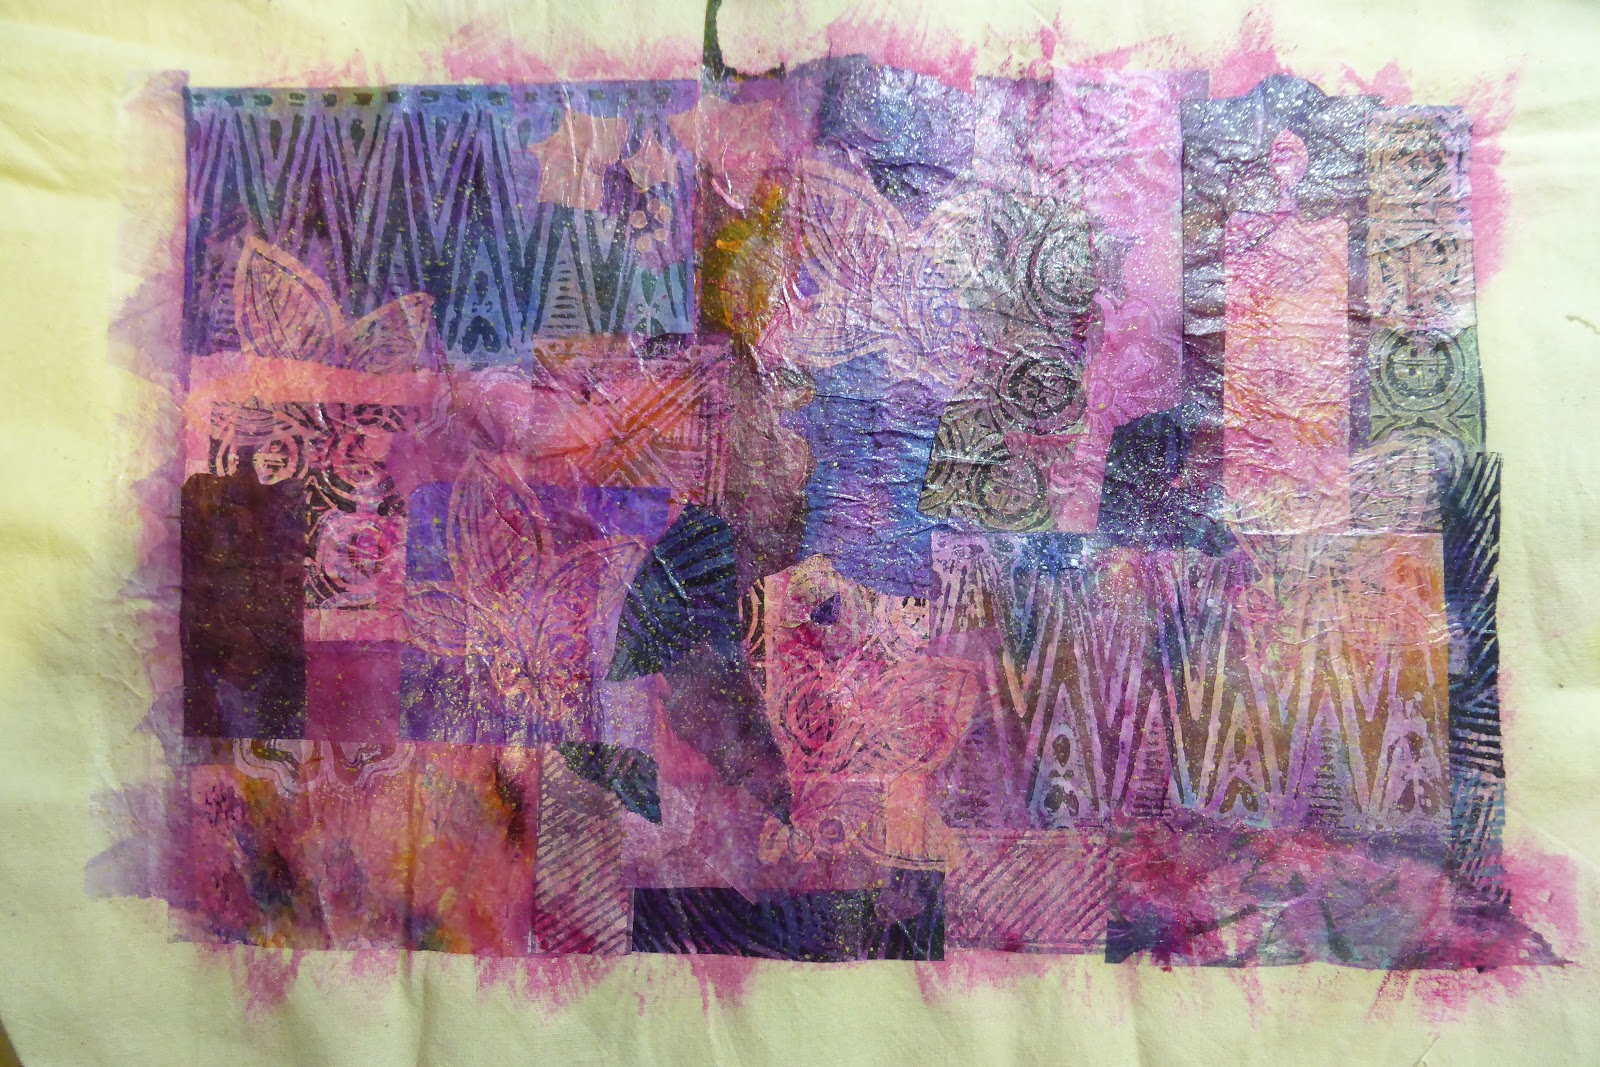
My paper fabric was not quite large enough, but fortunately I had left a fair margin of the base material to enable me to add more strips of tissue. Further glazes, printing and random machine stitching were applied and a lining made from some discarded navy t-shirt material.  The material was easy to work with and machine stitching no problem - perfect.....  except my measurements were not and the case was just a mere fraction too small!!  Not to be beaten at this late stage, I prepared another strip of fabric paper and added this on, so it has ended up a bit of a "mish mash", however, it will serve its purpose until my next attempt.

The paper button is made from 3 layers of watercolour paper, covered with tissue
Final size 9" x 5.75"
I am not sure how long this will last,  Although the fabric paper folds very easily, I notice there are some signs of cracking  along one edge - next time it might be worth using some plain fabric bias binding to protect the edges.

Tuesday, 2 July 2019

Mini collages


A couple of years ago I made a book of mini-collages using pages from some tiny sample pads sent to me by Hahnemuehle.  That book can be seen here.

Winding down after framing three paintings for my local art group's exhibition later this month, I wanted to play around with another set of small collages, using up some painted paper scraps, sketchbook scribblings and left over lino prints.  It was a conscious decision to start with a floral theme, but I hadn't particularly planned the pink colour scheme which seems to have taken over!

The pages are 3" x 4", cartridge/drawing paper I think, which I have primed with gesso on both sides to make them a bit sturdier.  Once I have enough pages I will probably make another little book to display them in.


Monday, 24 June 2019

The Art of the Fold - Crown Card

The Crafting Handmade Books challenge for this month was both the Crown Book and the Crown Card.  To make a reasonably sized book you need fairly lengthy strips of paper, so I have given that one a miss for the moment and concentrated on the greeting card.  I utilised a page from an old atlas for the outer folds and a small sheet of scrap-book paper on which to write my message and add some postage stamps.  It seemed like an appropriate "bon voyage" card for someone heading halfway round the world.

Closed dimension approx. 3" x 8"


Tuesday, 18 June 2019

Boots and shoes

The subject of yesterday's art society's two hour evening workshop was "boots and shoes" in any medium.  I must admit it was not a subject I found particularly appealing so I tried to think of a more challenging way of approaching it, other than just producing a drawing or painting.

During the afternoon I made a lino-cut of a trainer, this was then printed onto various patterned and hand-painted papers to be cut up and collaged in varying combinations during the evening session.  The white prints were made with gesso, but were not showing up well on some of the papers so I decided to do some in black.  I was going to use black gesso, but picked up water soluble block printing colour by mistake and, despite a session with the hairdryer, these were not fully dry by the evening.  However, with care and a supply of baby wipes to hand, I managed to produce a reasonable image without smudging too much black ink everywhere.


The lino-cut is approx. 5" long


Tuesday, 11 June 2019

Lino printing workshop

Early on in my efforts with relief printing, I attended a local course on the three colour lino print process.  My initial attempt wasn't very good and my clown ended up looking rather sinister, but rather than waste time cutting a new block I concentrated on getting to grips with the different cutting and inking stages, as well as exploring the varying ways the same print could be used.

My prints weren't good enough to be used for anything other than reference so I decided to write up some notes from the weekend and chose 18 slightly differing images, all bound into a Japanese style album. It has become a handy little reference book - I am sure I would have forgotten most of it otherwise.

This has been added to the Bookbinding page, where you can see other examples of my artists' books.


A selection of some of the prints


I cut out and removed the clown and balloons from the brown
paper and glued the background over the print on the painted mulberry paper*.
 (Unfortunately, this was not a good print, but I liked the
effect of using the two different papers in one image.)
The clown cut from the brown paper (above) was collaged onto
 this print on cream paper


Sunday, 9 June 2019

Printing and painting papers


Just trying out my recent lino cut and splashing colour around.  This design was not at all pre-planned  and when I had finished cutting I decided to shape the edges of the block as well.  In future, if I plan to use a block as a repeat print I could try and make sure any curved edges fit together neatly.

Mulberry paper, printed with white gesso, then adding yellow, red and blue ink


Computer paper, gesso lino print, random acrylic inks,
silver acrylic foam stamp

White gesso on black paper, randomly applied acrylic inks,
metallic splatter

White gesso on masa paper, quin. gold fluid acrylic and walnut ink


Saturday, 1 June 2019

Urban Sketchers June

We had glorious weather for our June sketch meeting today.  Our venue was the small Wiltshire town of Cricklade - the first town situated on the River Thames as it flows, from its source, towards London.  Just outside the town are the water meadows which are famous for an extensive display of snake's head fritillaries in April.  A previous post gives details of the artists' book I made about this beautiful wild flower location.

Today, most of us opted to sketch in the tranquil surroundings of St. Sampson's Church.

Trying out a suggestion by (Karen Stamper) which I recently found on on the internet, I pre-prepared two pages of my watercolour Moleskine.  Torn strips of masking tape, labels, etc. were added, followed by random washes of Indian ink, walnut ink, a little orange fluid acrylic and areas of white gesso scraped on with a credit card.


Some of the masking tape has been removed, but a couple of the labels
threatened to tear the paper surface, so they were left in place

I chose to record this corner of the churchyard


A somewhat messy outcome (and a missing gable window!),
but a fun experiment
I used a fine liner pen, burnt sienna watercolour marker, black Pentel brush pen, watercolour, white gouache and oil pastels.  I'm not sure I will adopt the masking tape and label idea, but the dark background encouraged me to be bolder with my sketching in an attempt to bring the image out of the chaos.